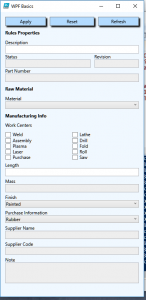
Last weekend I decided that I was finally going to figure out how to stop using Windows Forms, and move to the newer Windows Presentation Foundation (WPF). Some time ago, I had read a WPF blog post from FoxDeploy.com, which shows how you can cut and past code from Windows Visual Studio into their code to easily create a WPF form for PowerShell.
I have Visual Studio from work, but you can use the new Community Edition, too. My first efforts at form design were frankly terrible. I went looking for a good tutorial on WPF, and found a great AngelSix.com YouTube video. In the video, the developer walks through creation of an order form for a hypothetical manufacturing company: I watched the video, stopping every few minutes to recreate what was being done on screen. I then saved the resulting XAML (pronounced “zamel”), and popped it into my FoxDeploy code.
It didn’t run. The error handling from the FoxDeploy snipped was pretty generic. I changed it to show the actual underlying error. Watch the first 30 minutes of the video, stopping at adding codes and events. Some notes:
-
- Create a WPF C# form.
- Remove <Grid></Grid> and replace with <StackPanel></StackPanel>
- Do not make the first line of code a comment. The FoxDeploy RegEx will choke, and you won’t get anything
- Don’t put any events in the XAML
- You can add effects and color using the Properties panel.
- Don’t drag form objects into position in the designer. The resulting code is terrible.
I am posting my version of the FoxDeploy code, together with my remarks within the XAML to provide some insight and guidance into how to get a handle with WPF forms. For information on setting up events you will need to spend some additional research time. The resulting effort is worth the work. I used my new knowledge to update the splash screen for my Test-DCs.ps1 script.